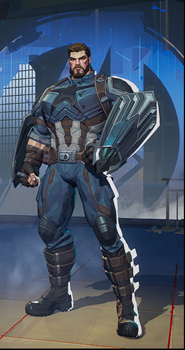
In Marvel Rivals, customizing your crosshair can significantly enhance your aiming precision and overall gameplay experience. Whether you’re a sharpshooter or prefer close combat, adjusting your reticle to suit your playstyle is a straightforward process that allows for greater comfort and effectiveness on the battlefield.
How to Change Your Crosshair Settings

To begin customizing your crosshair, navigate through the in-game menus:
- Access Settings: Open the main Settings menu from the game’s interface.
- Select Input Method: Choose either the “Keyboard” or “Controller” tab, depending on which input device you are using.
- Navigate to HUD/Combat: Within the selected Input Method tab, look for and navigate to the section related to HUD or Combat settings. This is where the visual display options, including crosshair controls, are located.
- Adjust Reticle Settings: In the dedicated crosshair or reticle settings area, you will find various options to tailor your crosshair’s appearance:
- Reticle Type: Select from fundamental shapes like Circle, Crosshairs, Dot, or combinations thereof.
- Size and Opacity: Modify the dimensions, thickness, and transparency of your reticle elements to improve visibility against diverse backgrounds.
- Color: Choose a color that provides high contrast and is easily discernible during intense combat situations.
- Animation: Toggle reticle animations (such as those indicating spread or firing) on or off based on personal preference.
Advanced Customization: Import Codes
For players who want to use configurations shared by others or apply precise settings, Marvel Rivals supports importing custom crosshair codes:
- Import Custom Codes: Within the crosshair settings area (often in the HUD section), locate the “Import Save” option (sometimes represented by a floppy disk icon).
- Enter Code: A field will appear where you can paste a desired crosshair code, which is typically a string of characters representing specific settings.
- Confirm: Click “Confirm” or a similar button to apply the settings encoded in the pasted code.
This feature allows for easy adoption of popular or pro player crosshair configurations and facilitates experimentation with different styles without manual adjustment of every slider.
Hero-Specific Reticles
Marvel Rivals offers valuable flexibility by allowing you to assign different crosshair settings to individual heroes:
- Select Hero: In the Settings menu, usually near the top left, you will find an option (often a dropdown menu) to select “All Heroes” or choose a specific hero from your roster.
- Customize: Once a specific hero is selected, any adjustments made to the crosshair settings will apply only to that hero, overriding the global settings.
This enables players to create tailored reticles that are optimized for each hero’s unique weapon characteristics, abilities, and combat role.
Saving and Managing Crosshairs
To easily switch between your preferred crosshair configurations, you can save custom presets:
- Save Preset: After customizing a crosshair configuration that you like, look for a “Save Reticle” or “Save As New” option.
- Manage Presets: The game allows you to save up to 5 custom crosshair presets (in addition to the default). These saved presets can be selected and applied quickly from a list, making it easy to switch configurations when changing heroes or playstyles.
Final Thoughts
Optimizing your crosshair in Marvel Rivals is a key step towards improving your aim and enhancing your performance.
By utilizing the game’s comprehensive customization options, including different reticle types, detailed adjustments, import codes, and hero-specific settings, you can create a crosshair that perfectly suits your needs and gives you the visual clarity required to excel in the dynamic battles of the multiverse.
Would you like to read more? Click the following link to how to copy team crosshair.
Written by:
Christian


