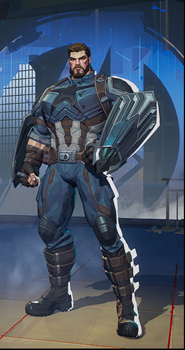
In the high-octane battles of Marvel Rivals, the thrill of victory is often sweeter when shared with friends. Whether you’re plotting intricate strategies for competitive ladder climbs or simply enjoying casual skirmishes with your favorite heroes, connecting with fellow players is a core part of the experience.
Thankfully, the game’s friend system is designed to be accessible and robust, boasting full cross-platform functionality that effortlessly unites players across PC, Xbox, and PlayStation. Here’s a comprehensive, step-by-step guide on how to forge alliances and send friend requests in Marvel Rivals.
Step-by-Step: Forging Friendships

Connecting with your allies in Marvel Rivals is a simple process, easily navigated through the in-game interface:
1. Access the Friends Menu
First, launch Marvel Rivals and once on the main menu, direct your attention to the top-right corner of the screen. Look for the “Friends” icon, typically represented by two silhouette figures or a distinct person-like symbol, located near your player profile. Clicking this icon will seamlessly open the Friends or Social Menu, which serves as your hub for all social interactions.
2. Locate Your Fellow Hero
Within the Friends menu, you’ll find a prominent search bar positioned at the top. This is your gateway to finding specific players. You can search for your friend using either their unique Marvel Rivals username or their Player ID (UID). The UID is a string of numbers that uniquely identifies each player, ensuring precise targeting.
For added convenience, if you’ve recently battled alongside or against someone you wish to add, navigate to the “Recent Players” tab. This section provides a quick and easy way to locate their profile without needing to manually input their details.
3. Dispatch the Alliance Invitation
Once you’ve entered your friend’s username or UID into the search bar, press Enter. Their profile should then appear. Next to their name, you will see an “Add Friend” button or a clear plus sign icon. Click this to send the friend request. Upon doing so, your friend will receive a notification within their game, giving them the option to accept or decline your invitation.
4. Accepting Incoming Requests
To accept an incoming friend request, simply navigate to the “Requests” tab within your Friends menu. Here, you will find a list of all pending invitations. Locate the request from your friend and click “Accept” to finalize the connection.
The Power of Crossplay: Bridging Platforms
One of Marvel Rivals‘ most commendable features is its comprehensive crossplay support. This means you can seamlessly add friends across different platforms, whether they’re playing on PC, Xbox, or PlayStation. Friends from other platforms will be clearly displayed in a separate section of your Friends List, simplifying management and enabling effortless team invitations.
Furthermore, if your Marvel Rivals account is linked to services like Steam, Xbox Live, or PlayStation Network, friends from those respective platforms may even appear automatically in your in-game list, further streamlining the social experience.
Quick Troubleshooting Tips
Should you encounter any issues while attempting to add a friend, consider these quick tips:
- Verify Spelling: Always double-check the spelling of usernames or UIDs to avoid errors.
- Online Status: Ensure both accounts are online and not currently engaged in another match if requests aren’t appearing immediately.
- Game Restart: If your Friends List isn’t refreshing, a quick restart of the game client can often resolve the issue.
In summary, adding friends in Marvel Rivals is a straightforward and intuitive process: access the Friends menu, search by username or UID, and send your request. Once accepted, you’re ready to assemble your dream team and dive into the action together, regardless of the platform you choose to play on.
Written by:
Christian


